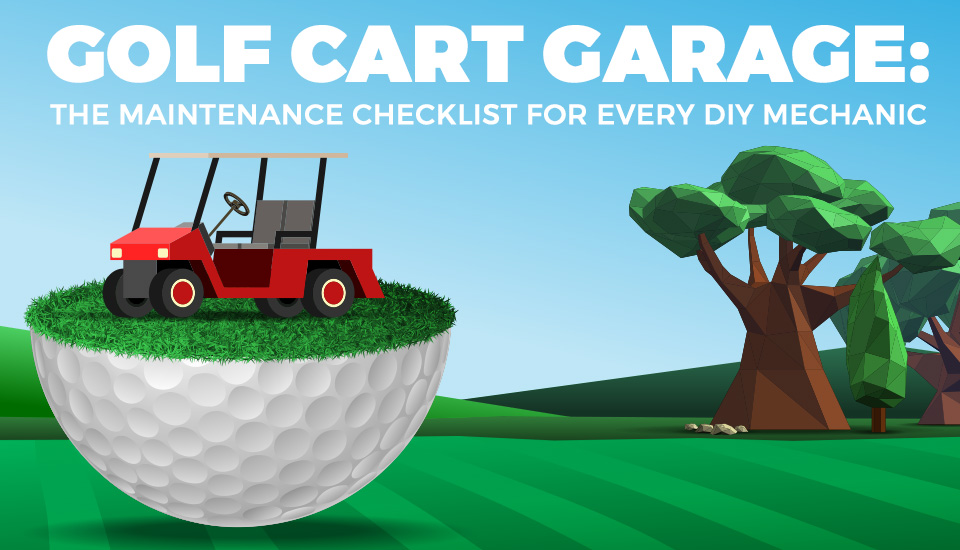
Golf Cart Garage: The Maintenance Checklist for Every DIY Mechanic
Jul 18th 2017
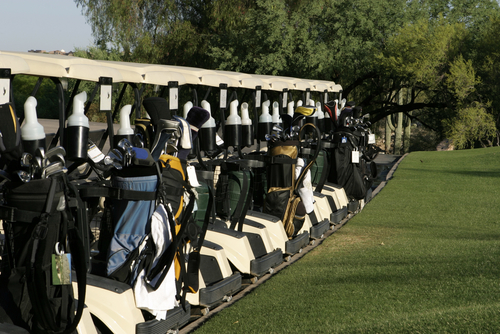
 Golf carts are now used for a variety of transportation purposes other than golf. All of these vehicles, however, need preventative maintenance procedures to keep them running smoothly.
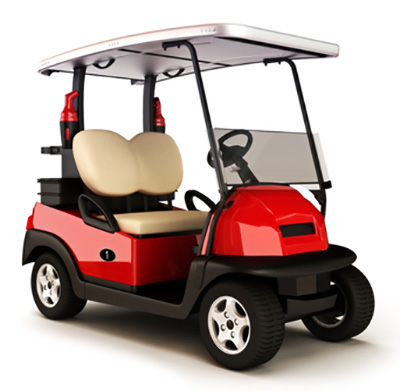
There are two main types of golf carts: gasoline and electric. Gasoline golf carts work just like little cars, with the exception that the cart uses an “on demand” engine. The engine starts when you step on the gas pedal, and it shuts off when you take your foot off the gas. That feature saves gas, cuts down on emissions, and helps keep the golf course quiet, too.
Most golf carts that are used exclusively for golf play are just basic two-seaters. However, modified golf carts are available that can carry more than two people and move supplies.
Gasoline golf carts can also be fitted with more powerful motors, beefed-up suspensions, and four-wheel drive, making them ideal for work in rugged areas.

Golf Cart Service Manuals
Golf cart maintenance is different for the gas and electric; however, they also share many common service requirements. No matter what type of golf cart you have, for the do-it-yourself mechanic it is highly recommended you purchase a maintenance manual before you start making repairs.

Types of Manuals
- Golf Cart Owner's Manual: Usually included with the purchase of a new golf cart, it includes instructions for operating your golf cart safely, general maintenance, and, sometimes, tips on easy repair problems; however, it is not a golf cart repair manual.
- Golf Cart Parts Manual: Usually not required for DIY maintenance and repair. Many of the online golf cart parts stores will provide parts information.
- Golf Cart Repair Manuals: Although they run from $50-$150, if you want to do your own golf cart repair, the golf cart repair manual is a must.
Electric Golf Cart Maintenance Checklist
The golf cart batteries in your golf cart make up its nerve center and provide the energy needed to finish 18 holes of golf, run down to the community supermarket, or spend an afternoon of lightweight off-roading. They also power all the electric accessories you have added to the cart to make your journey more pleasurable. As powerful as a battery pack may be, they are vulnerable and the most frequent source of golf cart problems. This makes proper battery maintenance, charging, and cleaning essential.

Deep Cycle Batteries
While they have the same appearance as the shallow cycle batteries (starting, lighting, ignition) found in a street car, golf cart batteries are significantly different.
Deep cycle (flooded or wet) battery characteristics:
- Contain electrolytes made up of a lead, acid, and water solution
- Produce an electrical current for long periods of time
- Require routine maintenance to maximize battery life
- Consume a considerable amount of water over their lifespan
The shallow cycle batteries (SLI) found in a street car produce a high current of electricity for a short period, required for starting the engine. SLI batteries cannot be used to replace the shallow cycle batteries in a golf cart.

Battery Charging
Proper charging is necessary for optimal battery performance and longevity.
Tips for safely charging a deep cycle battery:
- Read the battery charger manual
- Recharge the batteries after every use. Batteries last much longer if you use the top half of the battery charge rather than over-discharging the batteries
- Use a heavy-duty 15-amp charging cord
- Charge the batteries in a well-ventilated area. Lift the seat for best ventilation
- Inspect the charger connections for debris, dirt, and wire fraying
- Make sure the lead plates are submerged in water
- Do not add water to the correct level before charging
- Make sure all vent caps are tight
- Make sure the charger connector is firmly connected to the receptacle
- If you suspect your charger is not working properly, take it to a professional
- Troubleshooting a possible bad battery charger can be difficult
Safety
Wear protective clothing, gloves, and goggles before you work on your batteries. The Run/Tow switch on most newer golf carts is used to protect the On-Board Computer (OBC) for towing, maintenance, and long-term storage. Before doing any maintenance, put the Run/Tow switch in the “Tow/Maintenance” position and the key switch in the OFF position.
Make sure the wrenches and tools you are using are wrapped in vinyl electrical tape to prevent the possibility of shorting out a battery which could cause an explosion.
With proper maintenance, golf cart batteries can provide good service for 6-10 years. Creating a monthly maintenance schedule and adhering to it will prove beneficial to the lifespan and performance of your batteries. The ideal schedule should include the following:
- Check for wire fraying, terminal corrosion, battery leaks, and any loose wire connections
- Clean the batteries, the area around the batteries, and the terminals
- Check the electrolyte level and add water when necessary
Long-Term Storage
For winter storage or extended periods of non-use, the following procedures will help maintain the batteries in good condition:
Neutralizing Battery Acid and Cleaning
During a charging cycle, the batteries release hydrogen gas, water, and acid droplets into the air that eventually find their way onto other components. Over time, those droplets, if left alone, will cause damage to the frame and anything else they touch. Before working on the batteries, use a battery acid neutralizer and remove battery corrosion on the batteries by spraying them with a mixture of sodium bicarbonate and water. Use a plastic spray bottle with the following mixture:
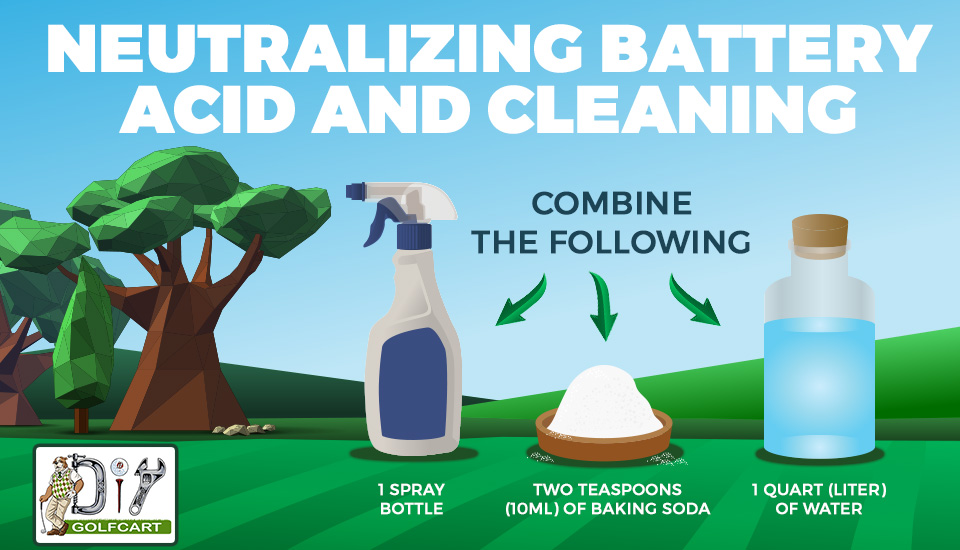
Two teaspoons (10ml) of baking soda + 1 quart (liter) of water
Steps for neutralizing and cleaning your batteries:
- Cover other electrical components before you spray and clean them.
- Make sure all vent caps are closed tightly.
- First, neutralize and allow the mixture to sit for at least 3 minutes.
- Use a cloth or soft bristle brush to wipe down the batteries (top and sides).
- Rinse the batteries off with clean water to remove the neutralizing solution.
- Dry with a cloth.
- Clean the battery terminals with a battery post and terminal cleaner.
- Spray terminals with a battery terminal protector.
- Reconnect the battery terminals.
Battery Watering
Golf cart batteries need the correct level of electrolytes to properly perform the chemical process of creating electricity. The solution that creates electricity consists of electrolytes and water. Batteries consume a considerable amount of water over their lifespan due to the charging process.
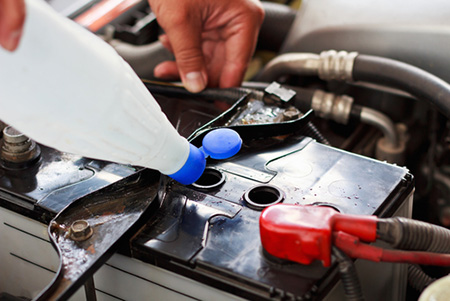
Overfilling or having too little water in your battery cells can negatively affect the batteries. Too much water will cause the electrolytes to overflow during the charging process. To prevent overfilling, use a golf cart battery watering system or a watering gun. Both options are fast and accurate because they automatically stop filling the batteries when the appropriate level is achieved.
Too little water in the battery will cause sulfation, which is a direct result of the lead plates not being covered by water during the charging process. Sulfation will cause permanent damage to the lead plates.
The proper time to fill the cells up with water to the correct level (½” above the plates and ¼” to ⅜” below the vent) is after the batteries have been charged. The charging process increases the electrolyte level, and that is why it is best to add water to the correct level after charging. The exception is when the plates are not covered by water.
In that case, add just enough water to cover the plates, charge the batteries fully, and then continue to add water to the correct level. Do NOT use regular tap water to fill your batteries. It contains contaminates that can cause damage. Distilled water is recommended.
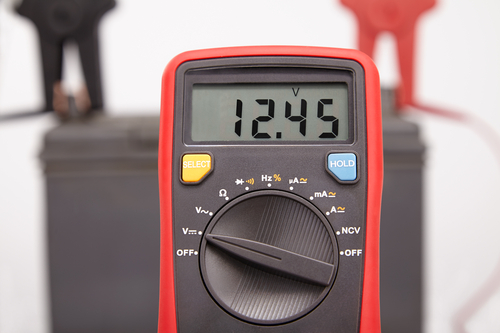
Battery Testing
A hydrometer is recommended for testing the state of charge for each battery cell. The hydrometer measures the density of the electrolyte by way of its gravity. A higher specific gravity indicates a denser electrolyte and a higher state of charge.
Battery Replacement
When it is time to replace your batteries, it is best to replace all of them at the same time. If you put a new battery in with an older pack of batteries, the old batteries will reduce the life of the new battery. Since the older batteries take longer to charge, the new battery gets overcharged and damaged.
Tire Pressure
Check the tire pressure frequently to maintain the recommended level. Partially deflated tires consume more energy, reduce the cart’s range, and wear out the tires faster. You will find the recommended pressure on the tire’s sidewall. If you use your cart mainly on streets, purchase street-legal tires with tread. Balloon Turf Tires wear out sooner and do not stop well on wet roads. Have a trained technician inspect your vehicle’s front wheel alignment, camber, and toe-in. Proper toe-in ensures the front wheels are pointing slightly inward to reduce wear.
Brakes
Most golf carts can travel at speeds between 20-25 mph, making an efficient and functioning braking system an absolute necessity. Inspect the brake shoes, cables, and hydraulic brake fluid semiannually.
Lights
For street-legal golf carts equipped with a light package, check turn signals, brake lights, and headlights frequently. If all your lights are not working, inspect the 12-volt fuse first. Consult the owner’s manual for the fuse location.
Lubrication Schedule
Consult your golf cart manual for specific lubrication recommendations. The Club Car manual, as an example, recommends lubricating the front suspension quarterly. Check your rear axle differential. It has oil in it just like a car. Remove the plug and put your finger in it and see if you draw oil. Fill it with a grease gun.
Mirrors
Many street-legal carts have side mirrors and wink mirrors on the windshield. Secure the thumb screws to make sure they stay in place.
Steering Wheel
The steering wheel rack and pinion should be greased annually. Inspect the steering yoke system to make sure all bolts are tight.
Gauges
State of charge meters measure the charge left in your batteries. As the batteries get older, these gauges are less accurate. Use a battery load tester to get an accurate reading.
Gas Golf Cart Maintenance Checklist
Engine inspection and maintenance require special tools and a basic knowledge of an engine tune-up.
- Inspect the engine for any signs of oil leaks
- Regularly check engine oil levels and change oil at proper intervals
- Check and adjust valve clearance on motors that allow it
- Inspect drive, starter, and generator belts for excessive wear. Replace if needed
- Check starter belt tension. Tighten if needed
- Inspect linkages from the accelerator pedal to the carburetor
- Check engine compression (requires engine compression tester)
- Check spark plug for wear or replace
- Clean or replace the air filter
- Replace the oil filter
- Check the fuel filter for debris or replace
- Look for starter/generator brushes wear. Replace if needed
- Check the points and condenser on older models. Replace if needed
- Check and adjust timing, as needed, if running rough
- Inspect, test, and maintain the batteries as recommended for an electric golf cart
Engine Troubleshooting
In addition to regular maintenance procedures, the gas golf cart engine may occasionally need troubleshooting. Here are some tips for solving basic engine problems:

Minor Problems
For an engine that does not turn over when you try to start it, check the gas first.
Next, check the battery cables for fraying or corrosion. Make sure they are tightly connected.
Inspect the distributor cap for cracks and moisture. If you see wetness, dry it out and replace. Check the spark plug wires for breaks, cracks, or disconnects. Replace any that are frayed or brittle. Remove the spark plugs and make sure the gap is set correctly. If they are blackened or burnt, replace them.
Check the air filter element to make sure it is not clogged with dust. Lack of air will cause an engine to stall out.
Finally, check all the fuel lines coming from the gas tank and going into the engine. If these lines have leaks, the engine may not be getting sufficient gas to keep it running. Inspect the fuel filter. A clogging filter can cause the engine to run roughly or not run at all.
Annual Maintenance
While a DIY mechanic can handle preventative maintenance, servicing your golf cart annually with a trained technician assures that no maintenance procedure has been overlooked.
Summary
A golf cart requires regular maintenance to ensure trouble-free vehicle performance. Whether your cart is used for golf or as a utility vehicle or is gas or electric, following a routine maintenance schedule is very important. It will prevent downtime and expensive repairs and give you years of reliable service. Follow the manufacturer’s recommendations for your home garage maintenance, but don’t hesitate to consult an expert when needed.